Warning: Trying to access array offset on value of type bool in /home/storage/4/95/9b/criacaodesitesemcuri/public_html/wp-content/plugins/elementor-pro/modules/dynamic-tags/tags/post-featured-image.php on line 36

Warning: Trying to access array offset on value of type bool in /home/storage/4/95/9b/criacaodesitesemcuri/public_html/wp-content/plugins/elementor-pro/modules/dynamic-tags/tags/post-featured-image.php on line 36

Warning: Trying to access array offset on value of type bool in /home/storage/4/95/9b/criacaodesitesemcuri/public_html/wp-content/plugins/elementor-pro/modules/dynamic-tags/tags/post-featured-image.php on line 36

Warning: Trying to access array offset on value of type bool in /home/storage/4/95/9b/criacaodesitesemcuri/public_html/wp-content/plugins/elementor-pro/modules/dynamic-tags/tags/post-featured-image.php on line 36

Warning: Trying to access array offset on value of type bool in /home/storage/4/95/9b/criacaodesitesemcuri/public_html/wp-content/plugins/elementor-pro/modules/dynamic-tags/tags/post-featured-image.php on line 36

Warning: Trying to access array offset on value of type bool in /home/storage/4/95/9b/criacaodesitesemcuri/public_html/wp-content/plugins/elementor-pro/modules/dynamic-tags/tags/post-featured-image.php on line 36

Warning: Trying to access array offset on value of type bool in /home/storage/4/95/9b/criacaodesitesemcuri/public_html/wp-content/plugins/elementor-pro/modules/dynamic-tags/tags/post-featured-image.php on line 36

Warning: Trying to access array offset on value of type bool in /home/storage/4/95/9b/criacaodesitesemcuri/public_html/wp-content/plugins/elementor-pro/modules/dynamic-tags/tags/post-featured-image.php on line 36

Warning: Trying to access array offset on value of type bool in /home/storage/4/95/9b/criacaodesitesemcuri/public_html/wp-content/plugins/elementor-pro/modules/dynamic-tags/tags/post-featured-image.php on line 36

Warning: Trying to access array offset on value of type bool in /home/storage/4/95/9b/criacaodesitesemcuri/public_html/wp-content/plugins/elementor-pro/modules/dynamic-tags/tags/post-featured-image.php on line 36

Warning: Trying to access array offset on value of type bool in /home/storage/4/95/9b/criacaodesitesemcuri/public_html/wp-content/plugins/elementor-pro/modules/dynamic-tags/tags/post-featured-image.php on line 36

Warning: Trying to access array offset on value of type bool in /home/storage/4/95/9b/criacaodesitesemcuri/public_html/wp-content/plugins/elementor-pro/modules/dynamic-tags/tags/post-featured-image.php on line 36
Como configurar assinatura HTML Outlook 2010 - Simples Ideia

Warning: Trying to access array offset on value of type bool in /home/storage/4/95/9b/criacaodesitesemcuri/public_html/wp-content/plugins/elementor-pro/modules/dynamic-tags/tags/post-featured-image.php on line 36

Warning: Trying to access array offset on value of type bool in /home/storage/4/95/9b/criacaodesitesemcuri/public_html/wp-content/plugins/elementor-pro/modules/dynamic-tags/tags/post-featured-image.php on line 36

Warning: Trying to access array offset on value of type bool in /home/storage/4/95/9b/criacaodesitesemcuri/public_html/wp-content/plugins/elementor-pro/modules/dynamic-tags/tags/post-featured-image.php on line 36

Como configurar assinatura HTML Outlook 2010

Neste tutorial aprenderemos com inserir/configurar uma assinatura HTML no Outlook 2010. Para isso temos que já ter criado um arquivo HTML com sua nova assinatura anteriormente, vejamos o passo a passo:

1. Abra o Outlook
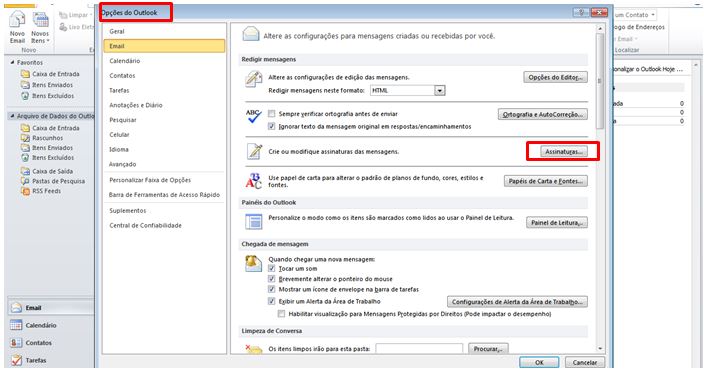
2. Clique em Arquivo | Opções

3. Na janela Opções do Outlook, clique em E-mail e depois em Assinaturas….

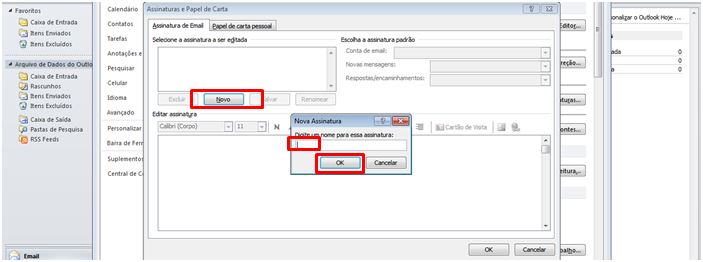
4. Na janela Assinaturas e Papel de Carta, clique em Novo e, na janela Nova Assinatura, digite o Nome da nova assinatura (Utilize exatamente o nome do arquivo HTML já criado). Em seguida, clique OK.

5. Insira na caixa Novas mensagens e na caixa Respostas/encaminhamentos, a nova assinatura.

6. Clique OK na janela Assinaturas e Papel de Carta e OK na janela Opções do Outlook.

7. Ao criar uma assinatura, o Outlook gerou três arquivos (HTM, RTF e TXT) em uma pasta padrão, onde o Office armazena as assinaturas. Para localizar os arquivos, abra o Windows Explorer e acesse o caminho:C:\Users\\AppData\Roaming\Microsoft\Assinaturas

8. Agora selecione o arquivo HTML criado anteriormente com sua nova assinatura e de um (Ctrl+C), em seguida vá até a pasta C:\Users\\AppData\Roaming\Microsoft\Assinaturas e substitua o arquivo.

9. Abra o Outlook, clique em Novo E-mail e a assinatura estará configurada.

Share on facebook
Share on twitter
Share on linkedin
Share on pinterest
Share on print
Share on email

Converse conosco

Pelos WhatsApps abaixo

[email protected]